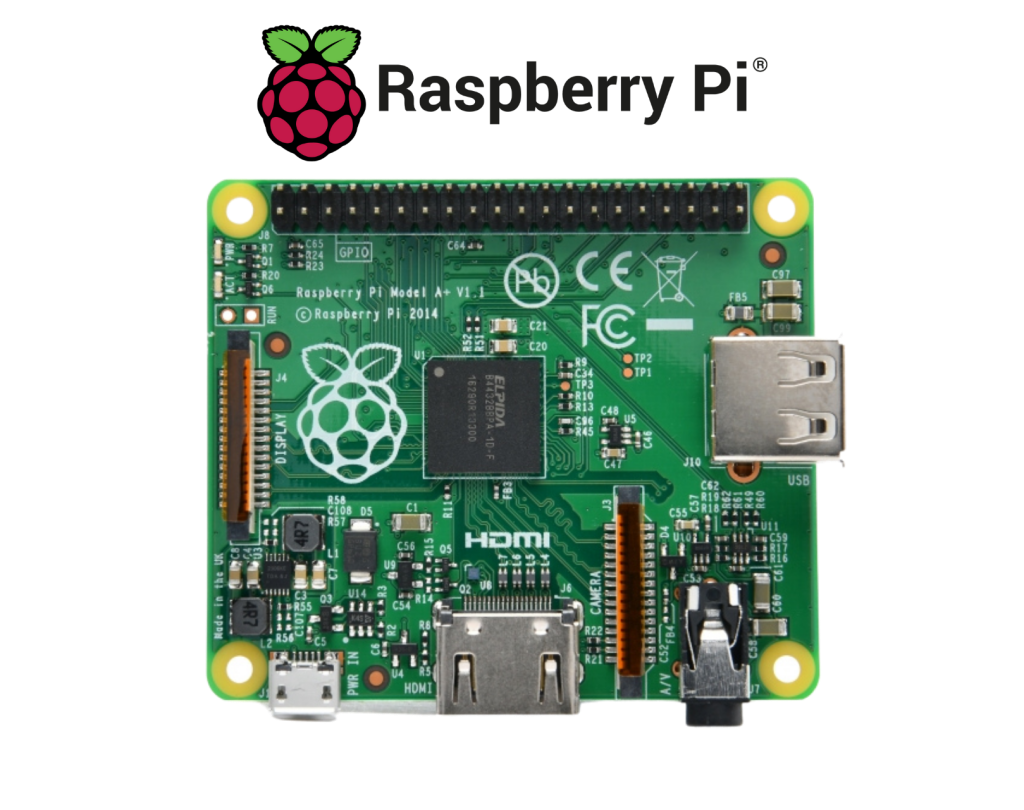
Raspberry Pi for Beginners is all about understanding how this small, affordable computer works and how you can use it for various projects, from learning programming to creating DIY electronics. Raspberry Pi is a single-board computer that provides a platform for experimentation, learning, and building projects across many fields such as coding, robotics, home automation, and more. It is widely used by hobbyists, students, and professionals to explore and develop new ideas.
Here’s a breakdown of what Raspberry Pi is and how you can get started as a beginner:
What is a Raspberry Pi?
The Raspberry Pi is a tiny, low-cost, single-board computer developed by the Raspberry Pi Foundation. It’s designed to be an affordable tool for learning programming and electronics, and it’s also versatile enough for creating various types of projects.
The Raspberry Pi comes with the following basic components:
- Processor (CPU): It runs the computer and handles tasks.
- RAM (Memory): This is the memory the Raspberry Pi uses to run programs.
- GPIO (General Purpose Input/Output): Pins on the Raspberry Pi board that allow you to connect sensors, buttons, LEDs, and other electronic components to create interactive projects.
- Storage: Raspberry Pi doesn’t have built-in storage, so it uses an SD card or microSD card for the operating system and data storage.
- Ports: Raspberry Pi models typically include USB ports, HDMI output (for connecting to a monitor), audio output, and Ethernet/Wi-Fi ports.
- Power Supply: It’s powered by a 5V adapter, usually through a micro-USB or USB-C connection, depending on the model.
Why Raspberry Pi for Beginners?
- Affordability: Raspberry Pi is cheap, with models ranging from $5 (Raspberry Pi Zero) to around $50 for more powerful versions (like Raspberry Pi 4). It’s a great way to dive into computing and tech without a hefty investment.
- Community Support: Raspberry Pi has a massive global community of users. There’s a wealth of tutorials, forums, and books available, making it easier to learn.
- Hands-On Learning: Whether you’re learning programming, electronics, or home automation, Raspberry Pi encourages hands-on experimentation, which can deepen your understanding of technology.
- Wide Applications: You can use Raspberry Pi for all sorts of fun projects, from creating a media center, to building robots, or automating your home.
Basic Components You’ll Need to Get Started
- Raspberry Pi Board: Choose the right model based on your needs. The Raspberry Pi 4 is a good choice for most projects, but if you’re on a budget or just want to get started with simpler tasks, the Raspberry Pi Zero or Raspberry Pi 3 Model B+ may also work.
- MicroSD Card: This serves as the storage for the Raspberry Pi’s operating system. You’ll need at least an 8GB microSD card (Class 10 recommended for performance).
- Power Supply: Make sure to get the correct power supply for your Raspberry Pi model (typically 5V/2.5A for Raspberry Pi 3 or 4).
- HDMI Cable and Monitor: You’ll need an HDMI cable to connect the Raspberry Pi to a monitor. Raspberry Pi 4 supports 4K output, but any monitor with HDMI input will work.
- Keyboard and Mouse: You’ll need these to interact with the Raspberry Pi when it’s connected to a monitor.
- Case: Optional but highly recommended. A case will protect the Raspberry Pi from dust, damage, and static electricity.
- Wi-Fi or Ethernet Cable: To connect to the internet and download necessary software or access online resources.
- Additional Components (Optional): If you’re working on electronics projects, you might want sensors, buttons, wires, LEDs, or other components to connect to the GPIO pins on the Raspberry Pi.
Setting Up Your Raspberry Pi
- Install the Operating System (OS) The first thing you need to do is install an operating system on your Raspberry Pi. The Raspberry Pi OS (previously called Raspbian) is the official OS and is based on Debian Linux.
- Download Raspberry Pi OS from the official Raspberry Pi website.
- Write the OS to a microSD card using software like Raspberry Pi Imager or balenaEtcher.
- Insert the microSD card into your Raspberry Pi and power it up. The Raspberry Pi will boot into the Raspberry Pi OS.
- Initial Setup
- Language and Location: Upon the first boot, you will be prompted to select your language, time zone, and Wi-Fi network.
- Update: Run an update to ensure your system has the latest software patches.
- Install Software: Use the Raspberry Pi Software Store or terminal commands to install additional software such as web browsers, coding tools, or games.
- Connecting to the Internet
- You can connect to Wi-Fi or Ethernet, depending on your Raspberry Pi model.
- You’ll need an internet connection to access tutorials, software libraries, and the Raspberry Pi community.
Basic Beginner Projects for Raspberry Pi
- Getting Started with Python Raspberry Pi is a great platform to learn Python, one of the most popular programming languages. Start by writing simple Python programs that control things like lights, or use sensors to interact with the physical world.
- Example Project: Use a Python script to turn an LED on and off using the GPIO pins on the Raspberry Pi.
- Create a Personal Web Server You can turn your Raspberry Pi into a web server using software like Apache or Nginx. Host a simple website or even use it for personal projects like a blog or portfolio.
- Example Project: Install WordPress or Jekyll on your Raspberry Pi and use it to host a blog.
- Home Automation With Raspberry Pi, you can control devices like lights, fans, and even your home security system through programming. You can connect sensors like motion detectors, door sensors, and cameras to your Raspberry Pi and automate actions based on events.
- Example Project: Build a smart light system that turns on when motion is detected.
- Media Center (Kodi) Use the Raspberry Pi to turn your TV into a media center with Kodi, a popular open-source media player. You can stream movies, music, and videos, or access streaming platforms.
- Example Project: Install OSMC or LibreELEC on your Raspberry Pi and create your own media hub.
- Retro Gaming Console Raspberry Pi can emulate old video game consoles. Using software like RetroPie, you can play retro games from consoles like NES, SNES, Sega Genesis, and more.
- Example Project: Install RetroPie on your Raspberry Pi and load up your favorite retro games.
Next Steps and Advanced Projects
Once you’re comfortable with the basics, there are many more advanced projects you can explore:
- Building Robots: Raspberry Pi can control motors and sensors, making it great for robotics projects.
- Weather Station: Connect temperature, humidity, and pressure sensors to create a weather monitoring system.
- Smart Home System: Use Raspberry Pi to automate tasks in your home, such as controlling lights, security systems, and appliances.
Tips for Beginners
- Start Simple: Don’t try to build a complex project right away. Start with something basic like lighting an LED or controlling a fan, then gradually build up your skills.
- Join the Community: The Raspberry Pi community is full of people eager to share their projects. You’ll find lots of forums, blogs, and tutorials to help you along the way.
- Experiment: Raspberry Pi is about learning by doing. Don’t be afraid to experiment with code, hardware, and configurations.
- Read Documentation: Raspberry Pi’s official website and the Raspberry Pi Foundation have extensive documentation that can help guide your projects.
Conclusion
Raspberry Pi is a versatile and powerful tool for beginners to dive into the world of programming, electronics, and DIY projects. With a low cost and a massive online community, you can create almost anything, from simple automation systems to complex robotics. By starting with small projects and gradually advancing your skills, you’ll be able to unlock the full potential of Raspberry Pi in no time.

